Editing Audio
Now we’ll walk you through the process of editing—cleaning up your audio, arranging it, and mixing it all together (i.e. fading talking bits in and out around music, breaks, etc.).
What you’ll find on this page:
- Cleaning up your audio
- Getting rid of unwanted room noise
- Getting rid of unwanted speech and other sound
- Arranging your audio
- Splitting audio clips
- Moving the audio around
- Mixing tracks
- Exporting your finished project
Cleaning up your audio
If you haven’t yet, go ahead and import your main audio (i.e. your voice recording, interview, etc.) into Audacity using the steps outlined in the previous section on recording audio.
1. Getting rid of unwanted room noise
When you originally recorded your audio, remember how we recommended that you capture a little bit of “silence” before you began speaking into the microphone? What that did was capture the ambient noise of the room/environment—the hum of the air conditioning, a busy street outside, a window fan, etc.—so that we can get a “noise profile” and get rid of it. Here’s how:
a.) Using the Selection tool (looks like: I), highlight a portion of that beginning noise, and in the top toolbar, go to Effect > Noise Reduction
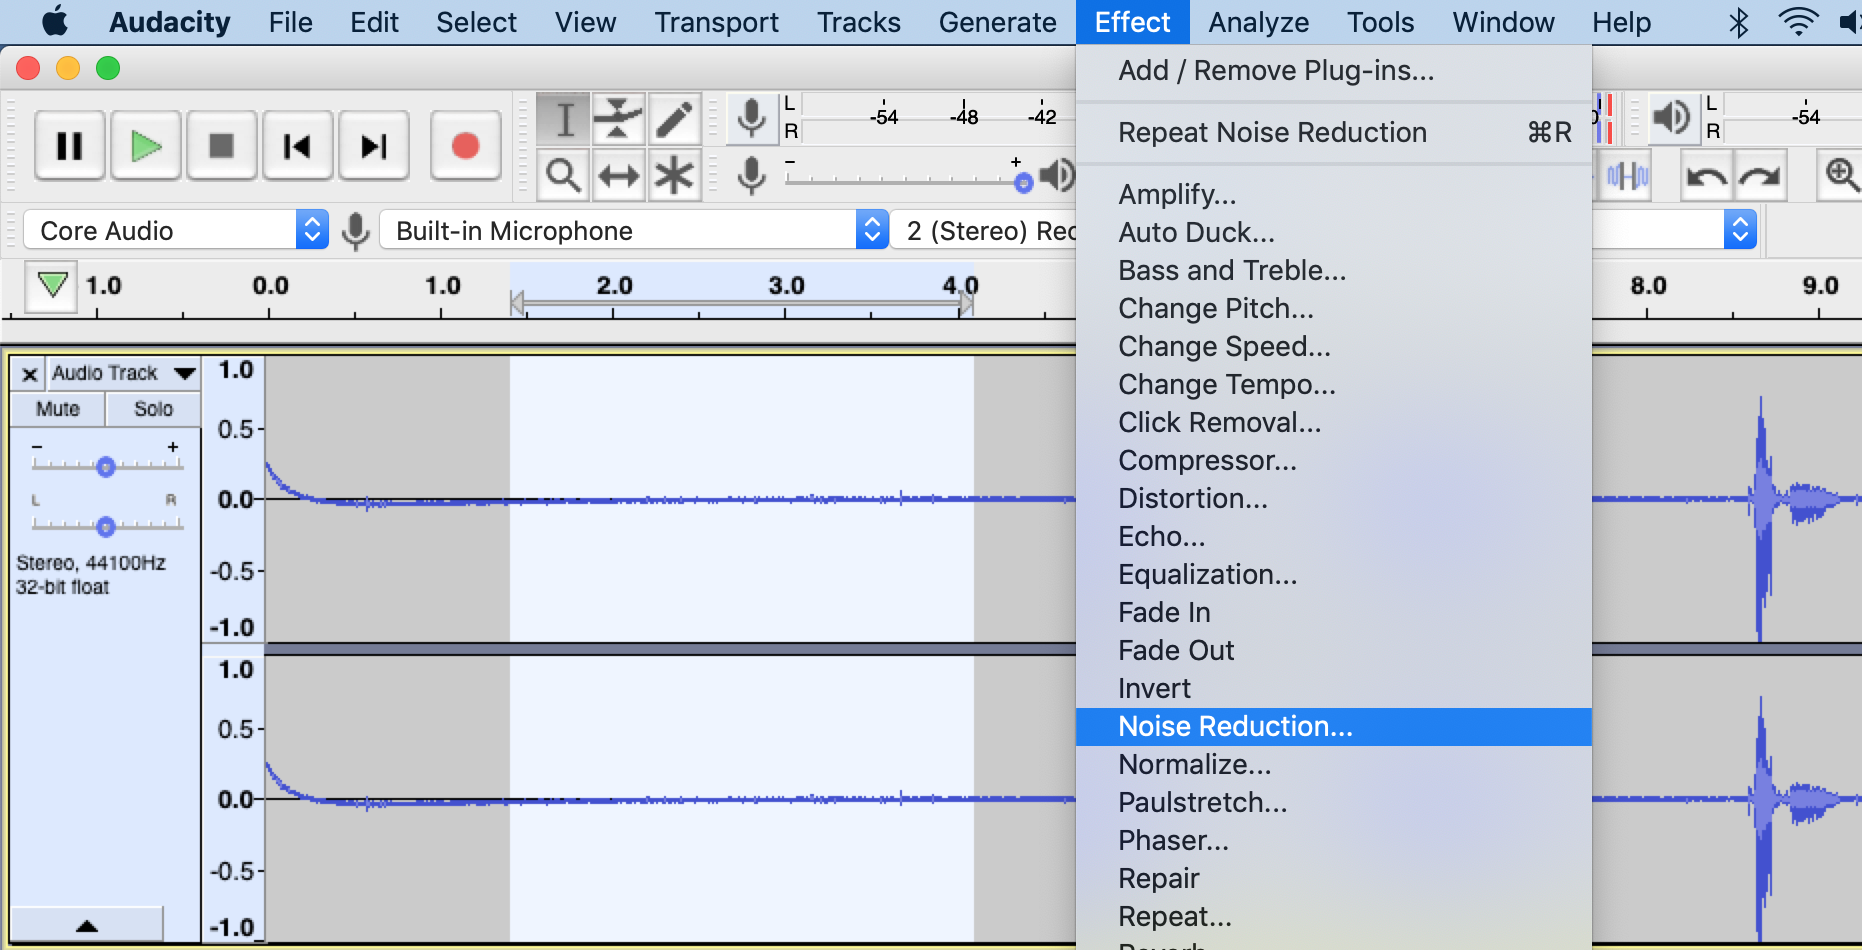
b.) In the resulting pop-up window, under “Step 1,” select Get Noise Profile
- This will teach Audacity what the noise you want to get rid of “looks like,” and thus the program will be able to easily find it everywhere in the recording.
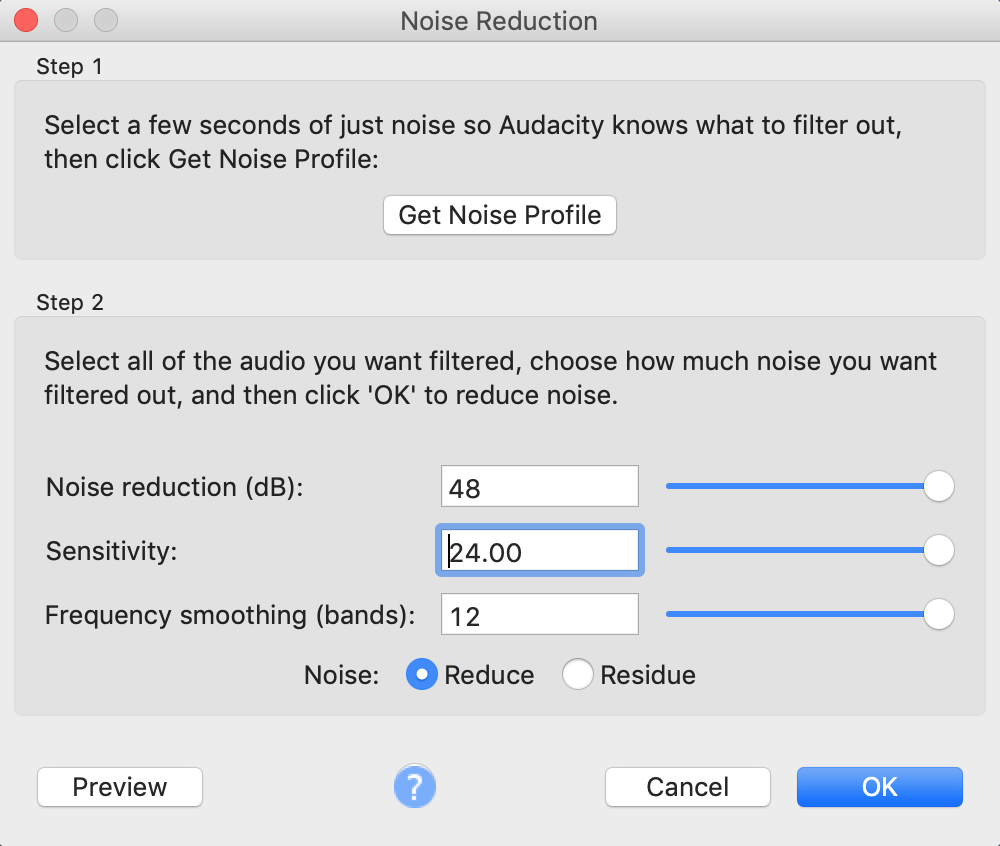
c.) Highlight the entire audio clip (double click anywhere in the audio clip with Selection tool) and go back to Effect > Noise Reduction and experiment with the settings under “Step 2” (Noise Reduction, Sensitivity, Frequency Smoothing) until you find the best sound (using the Preview button)
- Notice that too much of the Noise Reduction effect will start to cut into parts of your speech, which you probably don’t want—so keep experimenting until you find a happy medium.
d.) When you find a setting you like, click “Ok” to officially apply the effect.
2. Getting rid of unwanted speech and other sound
Everyone, um, when they talk, like, sometimes we use a lot of, sort of, filler words when we’re thinking of what to say. Now is your chance to easily cut-out any unwanted speech patterns and other noises (like a bump in the mic, or long periods of silence during a monologue or interview, etc.). Here’s how we do it:
a.) Using the Selection tool (along with the Zoom tool, which looks like: 🔎) highlight a portion of the audio clip you want to get rid of and…
b.) …hit the delete key.
—Done!
But there are some important things to consider, here.
It’s nice to be able to cut out vocal tics like “um” and “like,” and it’s especially nice to get rid of long pauses in order to keep the podcast moving swiftly along, but cutting too much away can have some strange effects—namely making the speech sound rushed and unnatural. You probably want some kind of human element, right?
There may only be the above 2 steps to this process, but it’s more involved than it seems, because you’re going to want to listen to the entire audio clip and assess your cuts based on the surrounding speech and context. You do a lot of pausing, re-listening, deleting, re-re-listening, deciding that “uhhhhh” was actually kind of cute and personable, undeleting, etc., before moving on.
First, here’s a great tip! Before you start slicing and dicing up the audio, get a pen and paper and listen through the entire project from start to finish, keeping an eye on the time/clock at the bottom of the Audacity window. Listen for anything you think you’ll want to cut out, and mark the time in the audio file where it happens. Then, go to the times you’ve listed and start cutting, but: start at the end of the audio and go backwards! Why? Let’s say you made a note about a hiccup at 00:30 in the audio and you go cut it out, then you move on to another hiccup you noted at 01:45…it’s not there anymore, because your previous edit moved the audio file up to close the gap around your previous edit! Starting from the end and going backwards ensures that your noted times will all be reliable.
Arranging your audio
Splitting audio clips
Now that you have nice, clean, noise-free audio, we can start laying out the architecture of your podcast. You may, at some point, want to split your audio clip into segments that you can move around (i.e. for music breaks, or commentary, etc.). Here’s how to do that:
a.) Using the Selection tool, click on the spot in the audio clip where you want to make the split (doing so should result in a thin, vertical, black line bisecting the clip).
b.) In the top toolbar, go to Edit > Clip Boundaries > Split to make the cut.
Now you have two separate clips.
Moving the audio around
Moving your different audio clips around is simple: from the top tool bar, select the Time Shift tool (looks like ↔), and drag the clip into the desired position.
As we mentioned earlier, you’ll want your main audio segments and background music/supplementary audio to be on separate tracks so you can overlap them and mix their volumes together (which we’re going to talk about next).
Mixing the audio tracks together
If you now have a few separate segments of speech and, on another track, some segments of music, your Audacity window should look something like this:
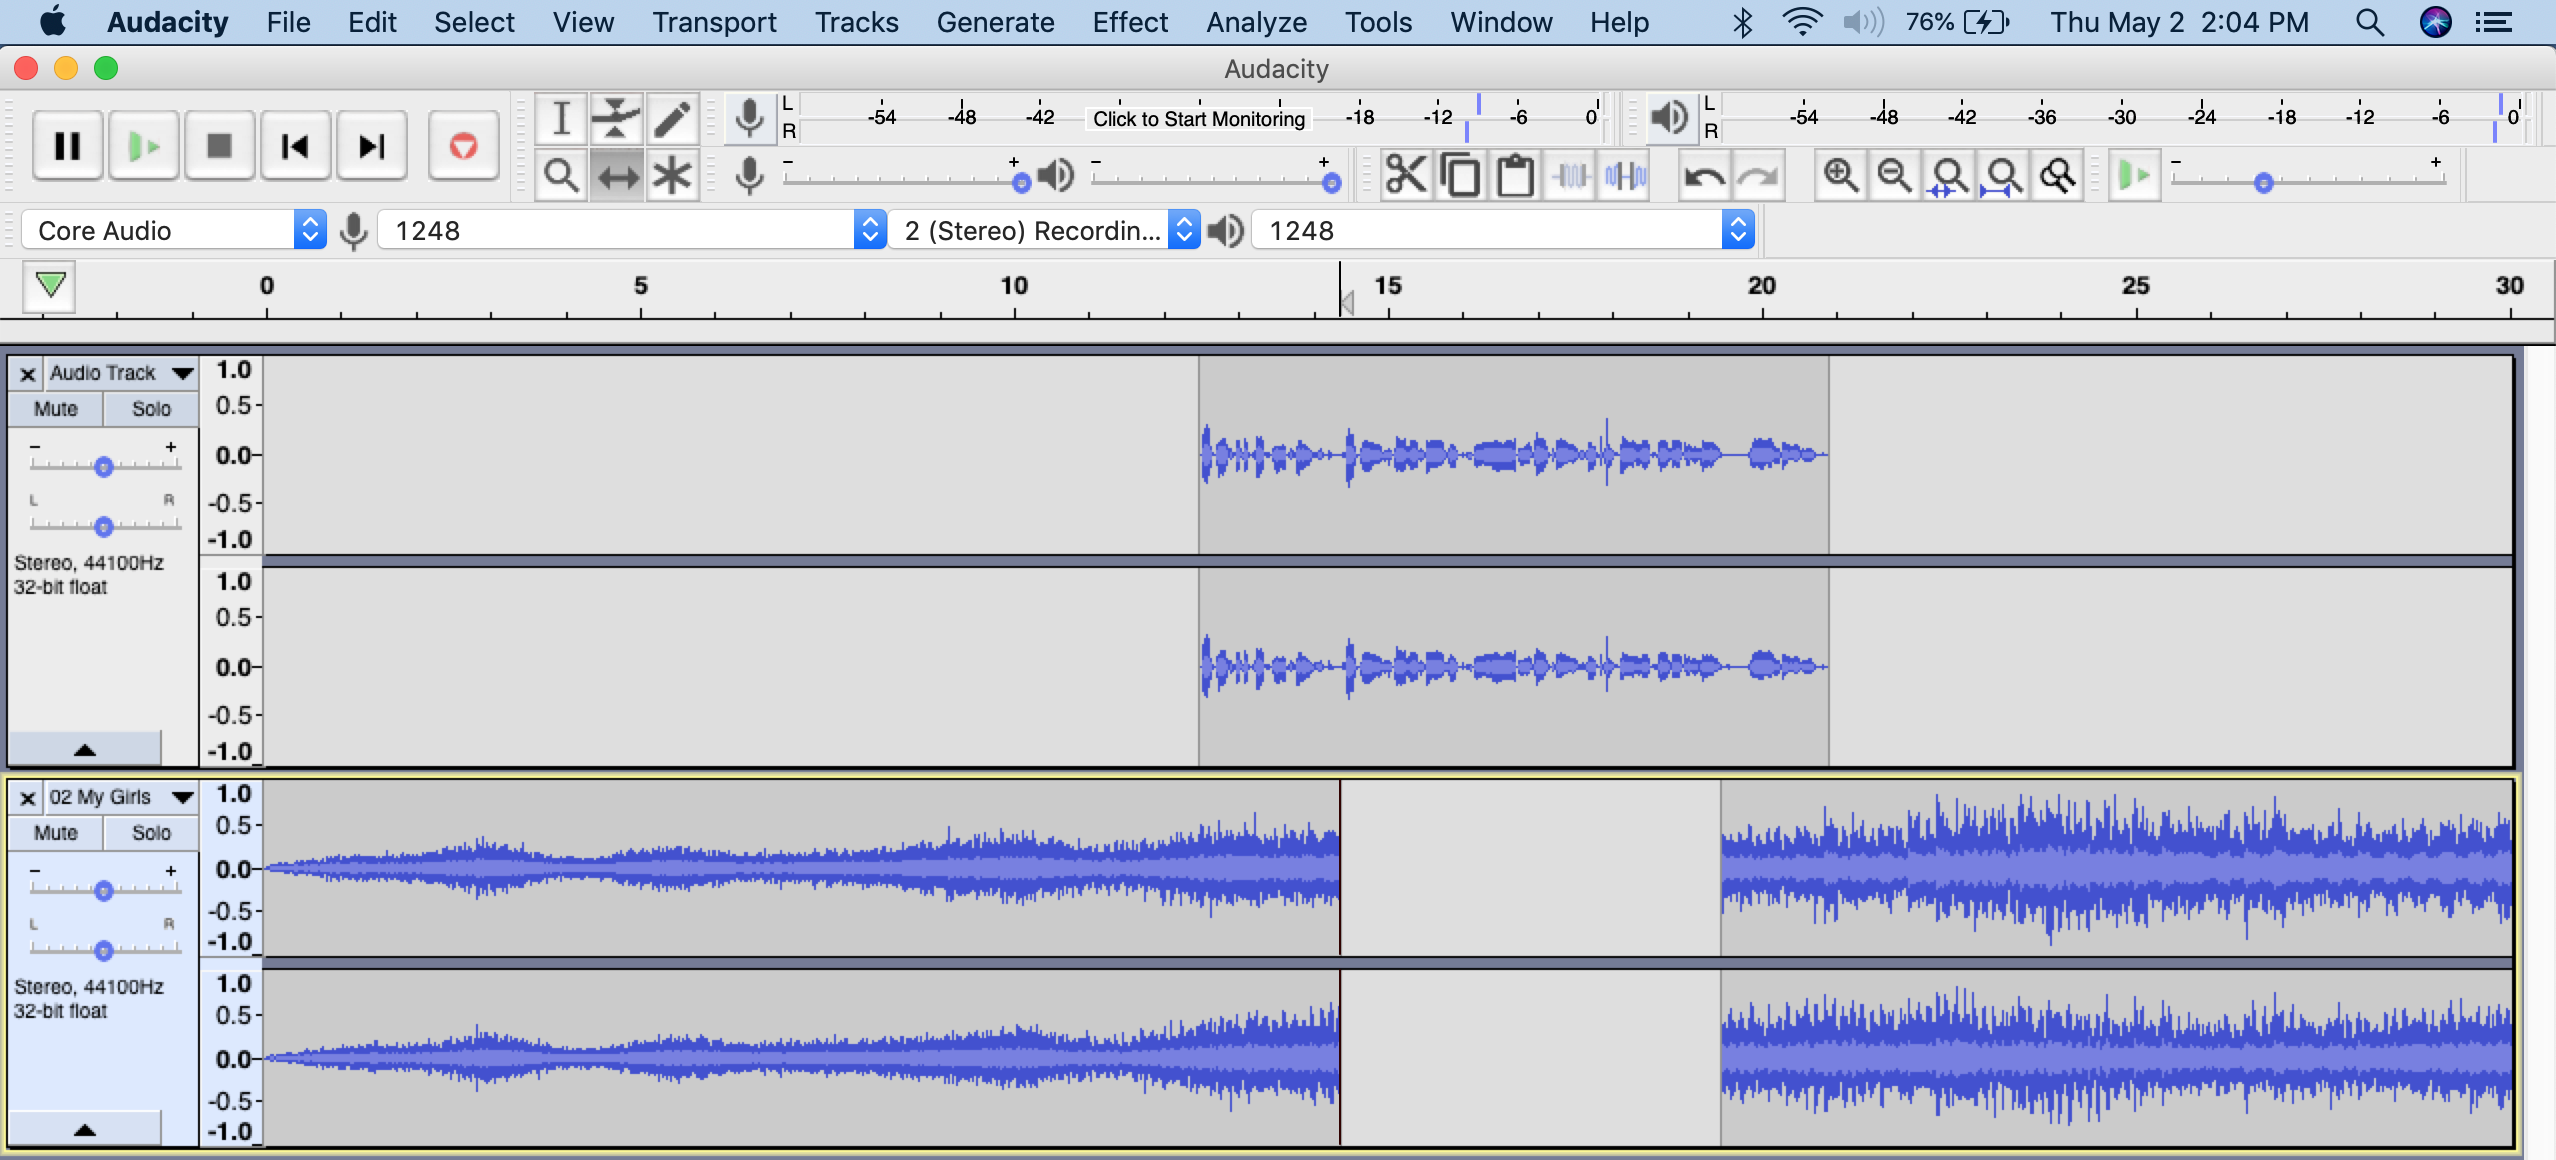
Note: In the above example, the music clips are in the top track, and the speech clips are in the track below.
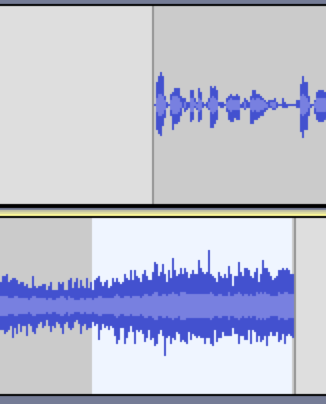
Now, to fade the intro music out so the speech clip can be the focal point, use the Selection tool to highlight a the portion of the music you where you want the fade out to happen. Notice we’ve highlighted the audio a few seconds ahead of the beginning of the speech:
With your selection highlighted, go to Effect > Fade Out. You’ll see that the shape of your audio clip tapers off at the end, now. Listen back to it and see how it sounds. You can add the Fade Out effect as many times as you like in order to increase the amount of the taper.
To fade audio back in? You guessed it—choose the Effect > Fade In and apply essentially the same process. In the end, your audio should look something like this:
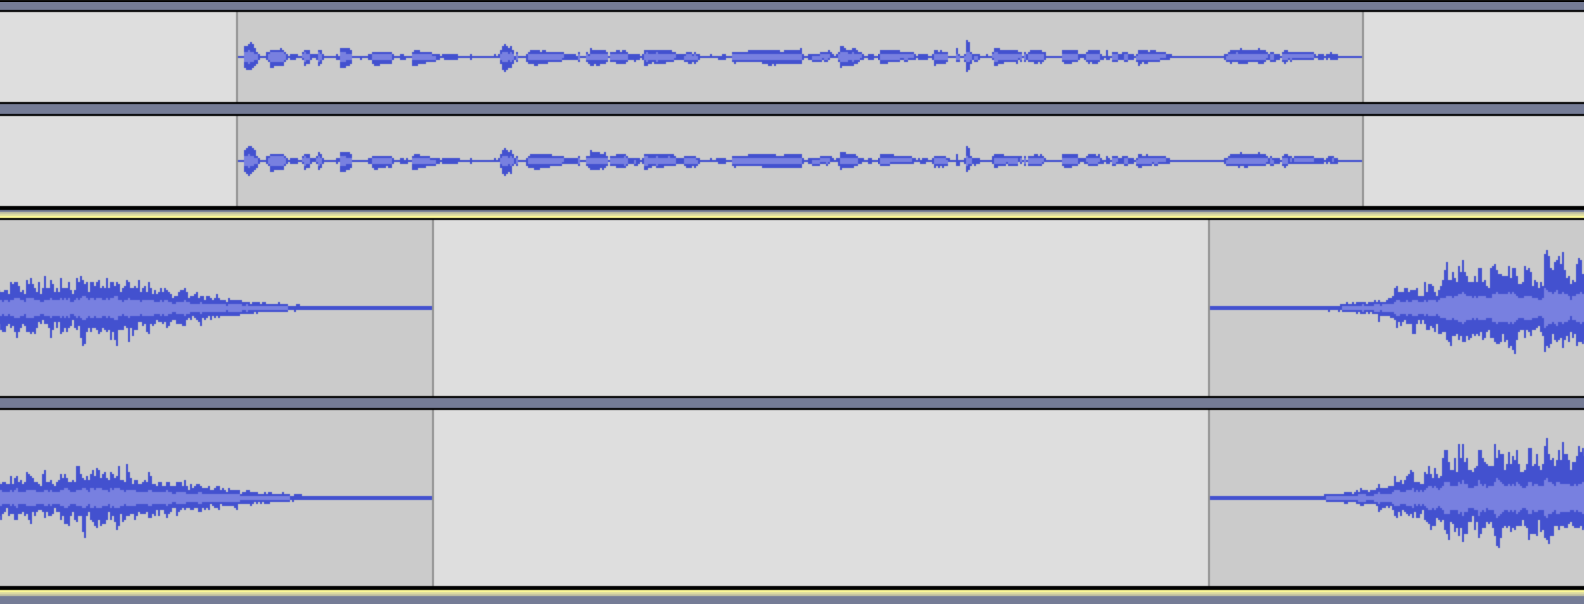
—and it should sound something like this:
(background music: “My Girls” by Animal Collective, from the album Merriweather Post Pavilion (Domino Records, 2009)
Exporting your finished project
Once you’re all done assembling your podcast in Audacity, it’s finally time to combine it all together into a single, playable audio file.
To do this, go to File > Export > Export as MP3 (or whatever file format you need). The resulting save window will have some default options which, for our purposes, we don’t need to change. Go ahead and choose your save destination and click Save.