Recording Audio
What you’ll find on this page:
- Capturing audio
- Tips for recording audio
- Getting audio into Audacity
- Pre-recorded audio
- Recording new audio directly into Audacity
- Background music
- Getting music into Audacity
Capturing Audio
Again, it’s beyond the scope of this simple workshop to delve too far into the recording arts, but here are a few important tips for capturing good audio (no matter how you’re doing it)—
- Record a few moments of silence before you start talking—(We’ll explain why in the following section)
- Stay near the microphone, and keep your proximity to it consistent—If you’re too far away from the microphone, you’ll sound quieter, and vice versa. And if you’re moving around too much, your audio will likely have subtle-to-significant fluctuations in volume. That said…
- Keep an eye on your input levels—Whether you’re using a field recorder or recording directly into a digital workstation, you’ll want to find and get familiar with the volume unit (VU) meter. Mostly, you’ll want to make sure your signal isn’t going into the red (which means your input level is too high/loud, and the audio will likely sound distorted), but you’ll also want to make sure your signal isn’t too low (which of course means your signal is too quiet).
- Try not to touch or move the microphone itself—Find a comfortable position for you and your microphone and try to stick with it. You might see professional broadcasters moving the mic closer to their mouths every now and then for dramatic effect, but they have really, really nice recording setups that allow for that. That said, keeping the mic still can be tricky if, say, you’re using a handheld field recorder for an interview and want to move it back and forth from you to your interviewee as you converse. If that’s the case, just try to keep a good, consistent grip on the device, and be sure it’s only being held by you (and not being passed back and forth between hands—you’d end up hearing that in the recorded audio, for sure).
- Remember to relax!—Anxiety when recording oneself is a very common response—you see the red recording light come on and…Gah! What am I going to say!? The thing to remember, though, is that nearly anything can be fixed or addressed in some way later on during the editing process. Long silences where you were thinking of what to say, slips of the tongue or awkward moments, coughs and sneezes—they can all be edited out, moved around, and manipulated. And the more relaxed you are behind the mic, the more likely you’ll be able to catch yourself when things don’t go exactly as planned (i.e. “Let’s try that again…”).
But the best advice we can give is to mess around for a bit at first—experiment, try some practice recordings before your interview/voice-over, and see what you learn or observe. Every recording setup and environment is going to be different, so you’ll need to get comfortable with your equipment and how it responds to the acoustic environment in which you’ll be using it.
Getting the audio into Audacity
Pre-recorded audio
If you’ve already got your audio recorded (i.e. you used a field recorder separately), you’ll want to import them into your audio editor to start moving the pieces around and building your podcast. With Audacity, there are a few ways to do this: 1.) from the main toolbar, select File > Import > Audio... (or Mac user shortcut: Command + Shift + I), or 2.) drag and drop the audio file from your computer folder directly into Audacity.
Remember! If you missed the the highly recommended plug-ins we mentioned in the “Set Up” section of this workshop, you’ll want to download and install those before doing the above.
Recording new audio directly into Audacity
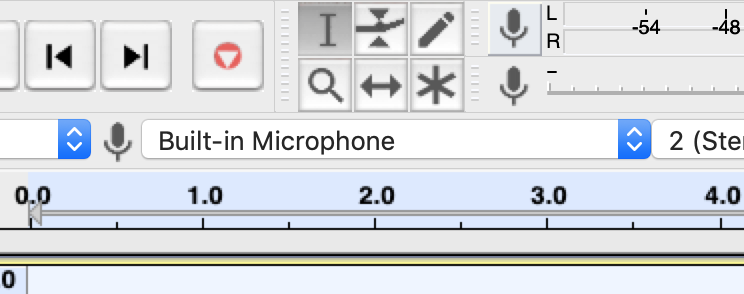
If you’re using a microphone connected to your computer, you’ll want to first make sure (after plugging the microphone in) to specify within Audacity which input source you’ll be using. You should be able to find your microphone in the following dropdown menu:
Once you’ve selected your mic, it’s as easy as hitting the record button:

Background Music
What’s a podcast without a little background music? If you’re looking to add a musical element to your podcast, be sure you own the rights to the music you use—or that you’re using royalty-free content from sources such as:
- YouTube’s Royalty-free Music Library—an enormous online database of free, downloadable music and sound effects.
- Epidemic Sound—Free 30-day trial, then $15/month.
- Free Stock Music—Account required, but free.
Note: Be sure to still check whether or not the music you download from such sites requires attribution—it might be free to use and download, but sometime you still have to give credit to the original creator (and these sites will tell you if that’s the case).
Getting the music into Audacity
You probably guessed it: this is the same process as importing your original audio. That said, you’ll want to create a new track for the music to live on all on its own so you can move it around in the mix when editing (which we’re about to talk about in the next section.